D-Section Rubber Extrusions: A Practical Edge Protection Guide
How to choose, install and maintain D-section rubber extrusions to protect warehouse walls, dock edges and vehicle contact points at low cost.
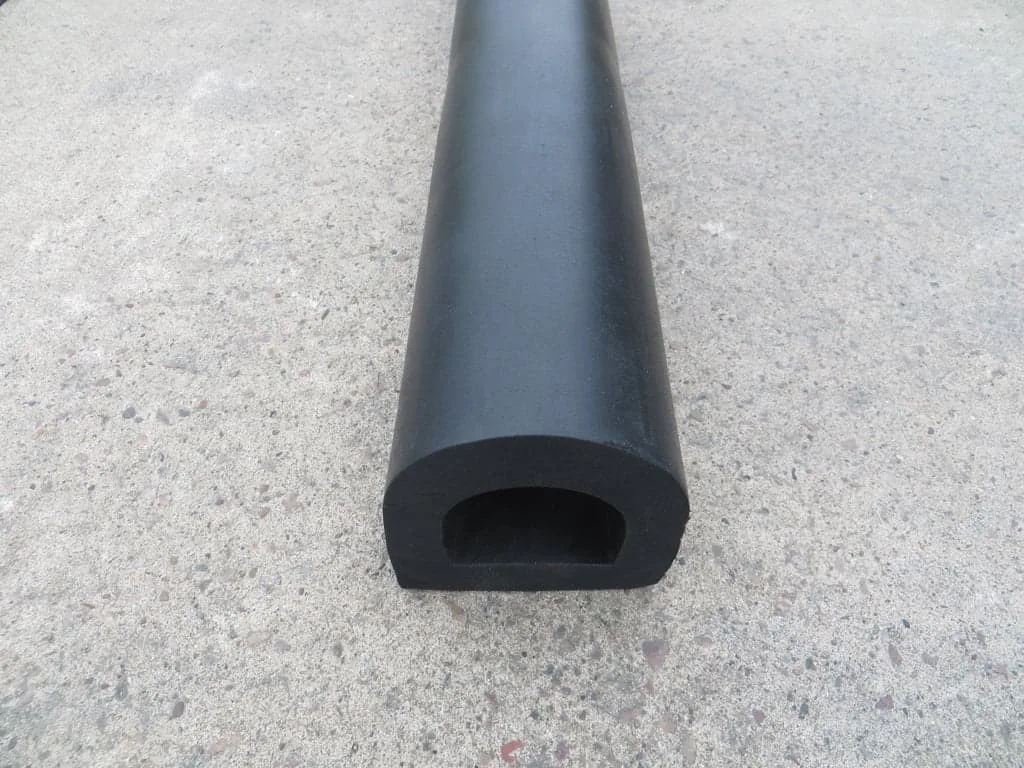
If you manage a warehouse, loading bay or busy car park, knocks and scrapes are simply part of daily operations. One of the most cost-effective ways to cut damage and downtime is to fit the right protective rubber, and D-section extrusions are among the most versatile options available. This guide covers what they are, where they work best, and how to install and maintain them.
What Is a D-Section Rubber Extrusion?
A D-section is a continuous length of rubber whose cross-section resembles the letter D. The flat face sits flush against the surface, while the curved face forms a forgiving buffer that absorbs impact and reduces scuffs, chips and dents. It can be cut to length, fixed with adhesive or screws, and applied along straight runs or gentle curves.
The material is tough, weather-resistant and flexible, which makes it suitable for both indoor and outdoor use. When you need a straightforward buffer that installs quickly, a D-section is a strong choice.
Where Is It Used?
D-sections provide sacrificial protection: they take the hit so your wall, post or vehicle does not. Typical applications include:
- Loading bay edges and door reveals, to prevent chipping and spalling.
- Vehicle contact points, such as service bay edges or door apertures.
- Warehouse columns and racking runs, against low-speed impacts.
- Car park corners and perimeter walls, where tight manoeuvres are common.
- Conveyor lines and machinery guards that need to soften occasional bumps.
Choosing the Right Profile and Fixings
Use D-section rubber for straight edges and door reveals, and dedicated corner profiles for external wall corners. Taller profiles protect a larger area from pallet-truck handles and door levers.
On concrete or block, suitable masonry fixings combined with construction adhesive reduce vibration. On metal or timber frames, screws with large washers spread the load. Always clean and dry the surface before bonding. High-visibility tape and contrasting colours help drivers judge distance even in low light.
Installation Tips
- Measure twice, cut once, and use a sharp knife or fine-tooth saw for clean ends.
- Dry-fit the length before final fixing to check alignment.
- Degrease the surface; adhesive bonds best on clean, dust-free substrates.
- Apply a continuous bead of adhesive along the flat face, and add mechanical fixings at intervals in heavy-duty areas.
- Seal cut ends wherever water ingress is a concern.
Durability and Maintenance
Quality rubber extrusions are built for repeated impacts and outdoor conditions, and the upkeep is simple. Inspect quarterly for deep cuts, loosened fixings or peeling adhesive; re-bond or tighten loose sections promptly; clean with a mild detergent to remove grime that masks visibility; and replace heavily worn lengths, which is quick thanks to the modular format. A small routine like this prevents bigger problems later, such as water reaching the wall or chipped masonry needing repair.